Monitoring Tool
[zabbix] 1. zabbix server 설치
NWSV
2020. 6. 15. 17:20
Zabbix server는 모든 Linux에서 설치 가능하지만 이번 실습에선 Ubuntu18.04에 설치하겠습니다.
- OS: Ubuntu18.04
- IP: 192.168.137.100
- 자빅스 버전: 5.0
Step1. zabbix server, frontend, agent 설치
wget https://repo.zabbix.com/zabbix/5.0/ubuntu/pool/main/z/zabbix-release/zabbix-release_5.0-1+$(lsb_release -sc)_all.deb
dpkg -i zabbix-release_5.0-1+$(lsb_release -sc)_all.deb
apt update
apt -y install zabbix-server-mysql zabbix-frontend-php zabbix-apache-conf zabbix-agent
Step2. DB설치 및 설정
a. DB설치
# apt -y install mariadb-client-10.1
# apt -y install mariadb-server-10.1
# apt -y install mariadb-common
b. root 비밀번호 변경
# mysql_secure_installationEnter current password for root (enter for none): Press the Enter
Set root password? [Y/n]: Y
New password: <Enter root DB password>
Re-enter new password: <Repeat root DB password>
Remove anonymous users? [Y/n]: Y
Disallow root login remotely? [Y/n]: Y
Remove test database and access to it? [Y/n]: Y
Reload privilege tables now? [Y/n]: Yc. database 생성
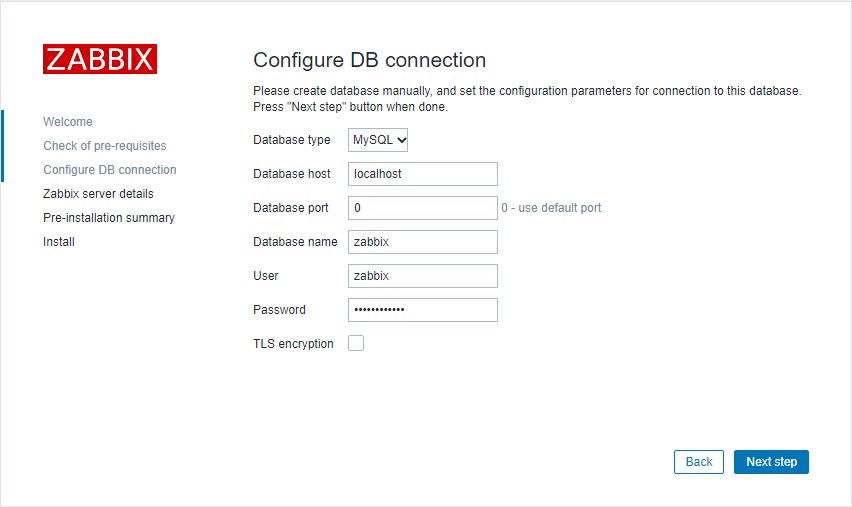
# mysql -uroot -p'rootDBpass' -e "create database zabbix character set utf8 collate utf8_bin;"
# mysql -uroot -p'rootDBpass' -e "grant all privileges on zabbix.* to zabbix@localhost identified by 'zabbixDBpass';"
d. initial schema와 data 추가
# mysql -uroot -p'rootDBpass' zabbix -e "set global innodb_strict_mode='OFF';"# zcat /usr/share/doc/zabbix-server-mysql*/create.sql.gz | mysql -uzabbix -p'zabbixDBpass' zabbix# mysql -uroot -p'rootDBpass' zabbix -e "set global innodb_strict_mode='ON';"e. zabbix conf 파일에서 DB 암호 변경
# vi /etc/zabbix/zabbix_server.conf

DBPassword=zabbixDBpass
Step3. zabbix frontend conf 수정
a. timezone 변경
# vi /etc/zabbix/apache.conf

php_value date.timezone asia/seoul
b. 데몬 restart 및 enable
# systemctl restart apache2
# systemctl enable apache2

# systemctl restart zabbix-server zabbix-agent
# systemctl enable zabbix-server zabbix-agent
c. web frontend 설정
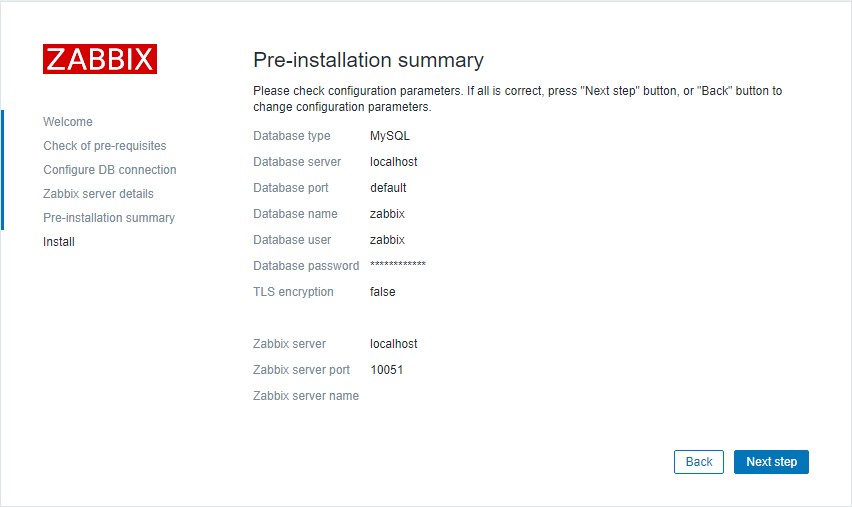
웹 브라우저에서 192.168.137.100/zabbix로 접속합니다. 설정 페이지에서 아래 Configure DB connection 수정 제외하고 전부 Next Step으로 넘어갑니다.
Step4.


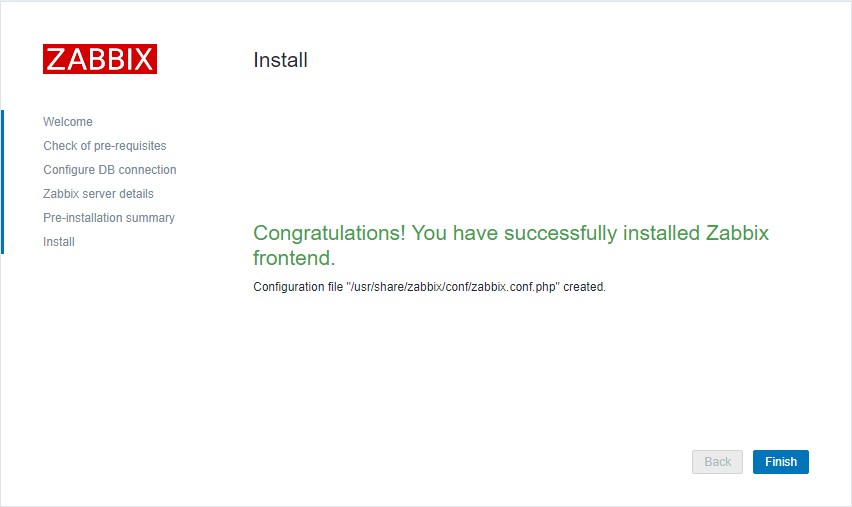
Step4. 로그인
Username: Admin, Password: zabbix 입력후 로그인 합니다.


---------------------------
zabbix server 설치 완료입니다. 다음에는 모니터링될 서버에 zabbix agent를 설치하여 모니터링이 될수 있게 설치 및 설정 방법을 알아보겠습니다.